In this blog post, I want to write about pipelines on how to prepare Nifti-brain data and make them printable by a 3D-printer.
Two pipelines are shown. One pipeline describes the 3D-printing the cortical folding structure that is estimated with Freesurfer and subsequently corrected with Meshlab. And another pipeline describes how you can 3D-print any binary nii-volume by using the AFNI-program IsoSurface and correct the output with netfabb.
Update May 6th 2025 by Chris Rorden
Since this blob post is from 2018 it is worth bringing attention to more current tools: https://brain2print.org/ provides a zero-footprint cross-platform drag-and-drop solution for 3D printing brains. Simply drop a NIfTI-format T1 file, select the desired segmentation and choose the mesh properties (e.g. hollow or solid). This does avoid the time and complication associated with Meshmixer, 3D Slicer, Meshlab, etc. Since all processing is done locally (using TensorFlowJS and WASM), private images are not shared. Here is the article about it: https://doi.org/10.1038/s41598-025-00014-5.
The AI models are only designed for 1.5-3T T1-weighted MR scans, however for CT scans or any voxels that have a clear intensity isosurface you can use our companion https://ct2print.org/ web page.
The web pages expects the voxels to be in a simple format (NIfTI, NRRD, MGH), so if the image is in DICOM, we provide a WebAssembly version of dcm2niix for converting DICOMs to NIfTI:
https://niivue.github.io/niivue-dcm2niix/
Pipeline 1: Cortex preparation with Freesurfer and Meshlab
Freesurfer analysis to get cortical sheet
In you don’t have it already, get FREESURFER.
1. Place NIFTI file to process it in /Applications/freesurfer/subjects
2. Open a shell, enter the following commands:
/bin/bash

FREESURFER_HOME=/Applications/freesurfer

source $FREESURFER_HOME/SetUpFreeSurfer.sh

recon-all –all –i PathOfNiftiFileHere -s mybrain
3. Once FreeSurfer has completed processing the scan (after about 24 hours) enter the following commands to convert the surfaces to STL files:
mris_convert /usr/local/freesurfer/subjects/mybrain/surf/rh.pial rh.stl

mris_convert /usr/local/freesurfer/subjects/mybrain/surf/lh.pial lh.stl
Processing in Meshlab
If you don’t have it already, get Mashlab.
1. Open Meshlab
2. File>Import Mesh> /Applications/freesurfer/subjects/mybrain/surf/rh.stl
3. File>Import Mesh> /Applications/freesurfer/subjects/mybrain/surf/lh.stl
4. Filters>Mesh Layer>Flatten Visible Layers
5. Click Apply
6. Filters>Remeshing Simplification and Reconstruction>Quadric Edge Collapse Decimation (this cuts out wholes and merges overlapping objects)
7. Enter desired Target Number of Faces (suggested: 200,000) and Apply
8. Optional: Filters>Smoothing, Fairing and Deformation>HC Laplacian Smooth (for esthetic reasons)
9. Export Mesh to convenient location, export as a .STL file 3D Printing


Pipeline 2: Printing arbitrary 3D-structures in nii with IsoSurface and netfabb
Converting binary nii volume to STL surface in IsoSurface
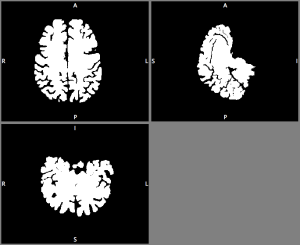
In case you want to 3D-print any other shape of the brain. E.g. entire brain including the cerebellum and brain stem (aseg volume file in FreesSurfer). You can also generate your own surfaces independent of Freesurfer.
This can be done in the AFNI program IsoSurface e.g. with the following command (this command takes less than 60 sec to run).
IsoSurface -isoval 1 -input binary.nii -Tsmooth 0.1 100 -remesh 0.5 -overwrite -autocrop -o Output.stl
The output of this command is not necessarily a 2-manifold. Thus, the 3D-printer cannot print it. It can be corrected, however, with netfabb.

Correcting for non-manifolds in netfabb
If its not already installed on the 3D-printer control computer, install netfabb basic.
1. Open netfabb-basic and load in the STL file that needs to be fixed for non-manifolds.
2. Click on the repair symbol (red cross).
3. Click on Automatic repair and Apply repair.

3D-printing in CatalystEX
1. Start the 3D-printer program CatalystEX and load in the STL file that you generated with either one of the steps described above.
2. Enter Properties as desired (suggested: “Sparse- low density” for model interior 0.40.5and “SMART” support fill).

3. Go to Orientation Tab, Click Auto Orient
4. Click Process STL. Note that processing may take some time.
5. Click Add to Pack Only Once (if you are printing a live size brain, this step can take up to 4 hours).
6. Click Print to Add File to Print Queue
-Note: Printing a large and detailed model will take about 3 days once printing starts.

Acknowledgments
I want to thank John Schwartz for teaching me on how to use a 3D-printer. I want to thank Pete Molfese for tips regarding IsoSurface.

I can’t get past the following step:
recon-all –all –i [path of NIFTI file here] -s mybrain
It keeps returning the following errors. Any idea what I am doing wrong?
recon-all -all -i /Users/tylerczerwinski/Downloads/Brain.nii.gz -s mybrain
mkdir: /Applications/freesurfer/subjects/mybrain: Permission denied
mkdir: /Applications/freesurfer/subjects/mybrain/scripts: Permission denied
mkdir: /Applications/freesurfer/subjects/mybrain/scripts: Permission denied
cp: /Applications/freesurfer/subjects/mybrain/scripts/build-stamp.txt: No such file or directory
cat: /Applications/freesurfer/subjects/mybrain/scripts/build-stamp.txt: No such file or directory
INFO: FreeSurfer build stamps do not match
Subject Stamp:
Current Stamp: freesurfer-Darwin-OSX-stable-pub-v6.0.0-2beb96c
/Applications/freesurfer/subjects/mybrain/scripts/patchdir.txt: No such file or directory.
LikeLike
Hi Tyler,
Sorry to hear that Freesurfer is not working for you properly.
Have you tried these solutions?
https://www.mail-archive.com/freesurfer@nmr.mgh.harvard.edu/msg27203.html
https://mail.nmr.mgh.harvard.edu/pipermail/freesurfer/2012-March/022752.html
You could also try to put the file somewhere where you have write permissions?
Or change the subject directory path to some place where you have write permissions:
e.g. with run “SUBJECTS_DIR=PATH_TO_directory” before executing the freesurfer command.
Or you just run it as admin:
sudo recon-all –all –i [path of NIFTI file here] -s mybrain
Hope that helps,
LikeLike
Similar issue to above but I get no match…..bash-3.2$ recon-all –all –i [/Applications/freesurfer/subjects/Pilot_11590_WIP_sMPRAGEs3_SENSE_6_1.nii] -s mybrain
set: No match…..any ideas?
LikeLike
Hi Brett, It looks like Freesurfer is not finding you file?!?!
Could it be that you use the square brackets in the command? Could you try to remove the brackets and try it again?
LikeLike
Any idea how to convert from freesurfer output to .nii? Hasn’t been working for me.
LikeLike
Have you already checked out this one from freesurfer? https://surfer.nmr.mgh.harvard.edu/fswiki/mri_surf2vol
I never used it though.
If you have AFNI installed, I would recommend the program 3dSurf2Vol.
LikeLike
I am having an issue getting the code working that you input for “Converting binary nii volume to STL surface in IsoSurface”. I converted my aseg.mgz file in suma using @SUMA_FSvolToBRIK though still cannot get my nii file to work using the code that’s given. Did I use the correct file, or did I use the correct conversion method for the file, or do I need to adjust the isoval? I have been changing it to different -iso commands to see if any of those work better and still can not get a good surface of the brain. Any help would be appreciated.
LikeLike